Creating Dungeons
Dungeon creation is a complex process. For modders just starting out, it is usually easier to take an existing dungeon, and modify parts of it to suit their goals, rather than create one from scratch. This guide walks through that approach, using the Tropical Path.
The most common aspects of a dungeon that people are interested in editing are:
- Attributes such as Dungeon Name, Music, Darkness
- Tileset
- Floor Features
- Number of Floors
- Item Tables
- Enemy Spawn tables
- Events occurring on completion
We will change them in that order.
This tutorial assumes you have completed the tutorial for Creating Ground Maps, and the Creating Dungeon Maps, although it does not use the ground and dungeon map created in it until the last section, “Editing Completion Events”.
Before starting, it is highly recommended you begin with your game set to a mod with the Modding Intro, so that you’re editing a mod instead of the base game. The tutorial will move forward with that assumption.
Editing Name
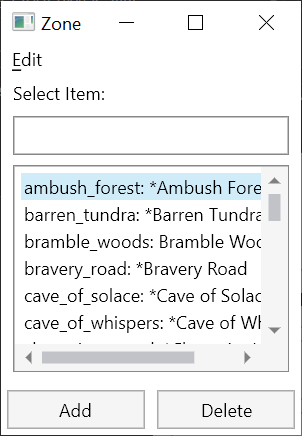
Begin by opening up Tropical Path in the Zones list.
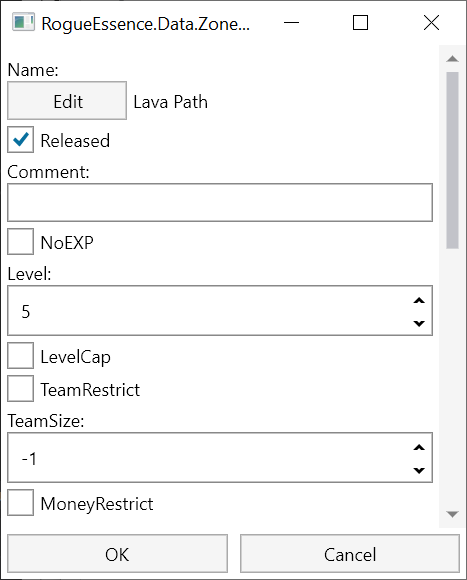
Click on the Edit button for Name.
Let’s rename it to Lava Path. Delete the LocalTexts too; they are the name of the dungeon in different languages!
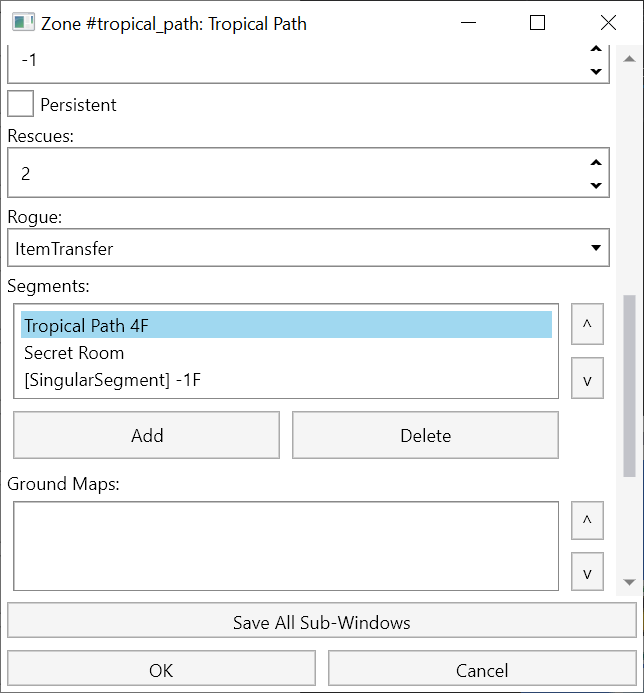
Next, scroll down to the Segments list:
Every dungeon consists of one or more segments. Each segment has its own name. Tropical Path has 3 segments: one is the main path, and two are secret paths. People also make more segments to split the dungeon up between a first and second section, ie. Mt. Thunder -> Mt. Thunder Peak. We only need the first segment; you can safely delete the other two. Then double-click “Tropical Path 4F” to edit it.
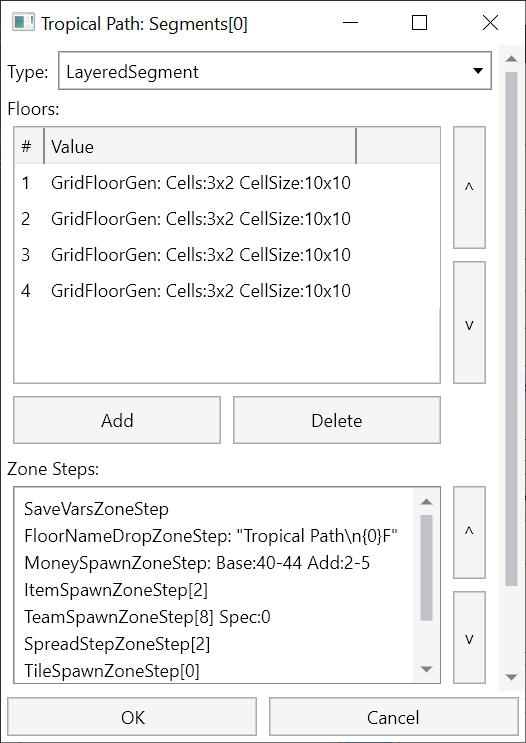
Every segment consists of a list of floors, and a list of Zone Steps. You can think of a Zone Step as an operation that is applied to every floor in the segment. Edit the FloorNameIDZoneStep.
On every floor, this Zone Step takes the map that is currently being generated, and changes its name to “Tropical Path\n{0}F”, where the {0} represents the floor number. Change it to “Lava Path\nB{0}F”
Click OK to go back to the Segment editor.
Editing Music/Darkness
We are going to change the music next. To do this, we need to edit the floor itself.
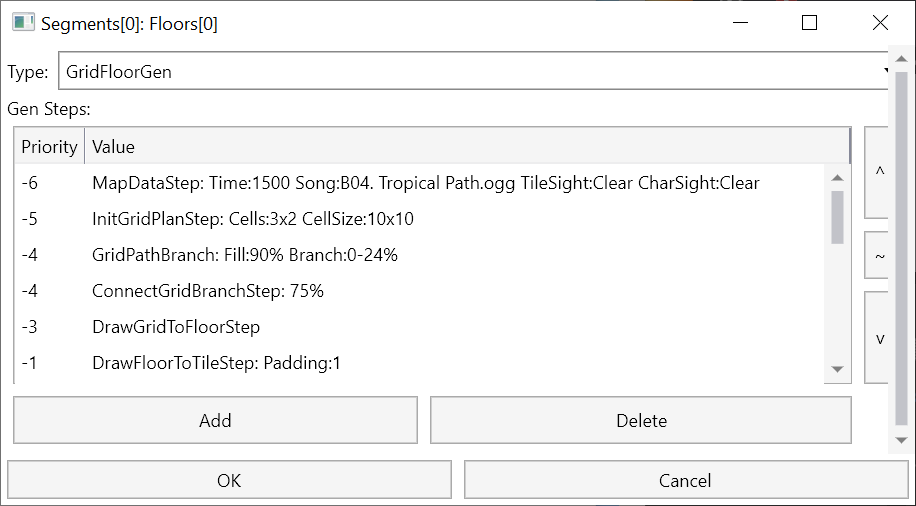
Double-click on the first item in Floors, GridFloorGen, to edit it.
Every floor is made up of Gen Steps. These are a sequence of operations that are performed on an empty map to generate the terrain, spawn items, set music, etc.
These steps are performed in the order of priority. A lower priority step will be done before moving on to the higher priority step.
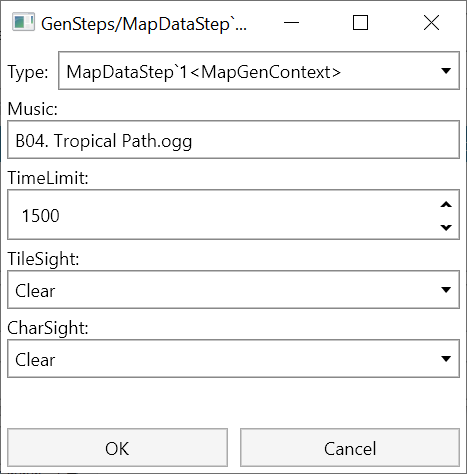
Double-click and edit the MapDataStep with priority -6:
You can change the basic attributes of the map here.
- Music is the song that plays on the given floor.
- Time Limit is the number of turns before the player is blown out of the dungeon. Warnings begin when there are 400 turns left.
- Tile Sight controls the player’s vision in regards to tiles.
- Char Sight controls the player’s vision in regards to enemies (and vice versa).
Sight has several settings:
- Clear: You can see any character/tile as long as it’s in your screen.
- Dark: You can see any character/tile as long as it’s not blocked by a wall.
- Murky: You can only see the character/tile right in front of you.
- Blind: You can’t see anything.
- Any: Unused.
See this page for screenshots of what these settings look like in use.
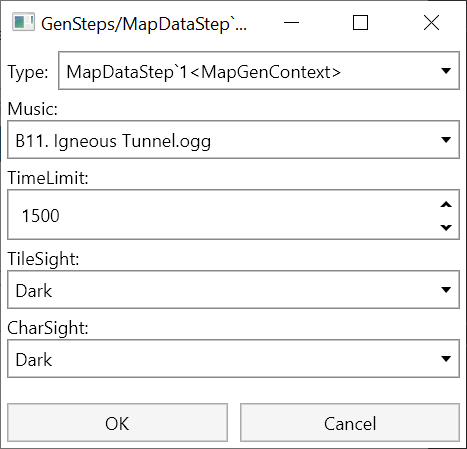
Change them to the settings below:
Click OK to save changes and return to the Floor editor.
Editing Tileset/Terrain
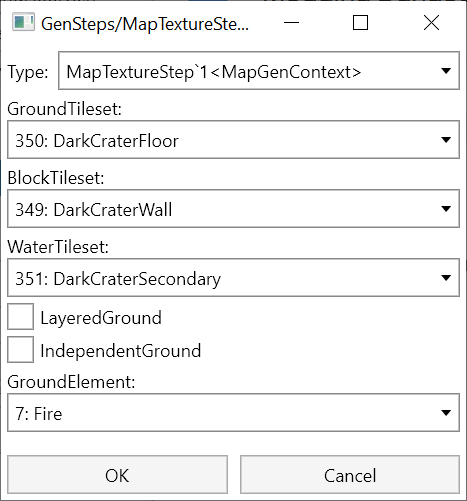
Currently, our dungeon is using a beach-like tileset from Howling Forest. Edit the MapTextureStep in the list of GenSteps.
We want to change this to use Dark Crater’s tileset from PMD2. We will also change the ground element to Fire. The Ground Element dictates what element the map will be. This is used for various moves such as Camouflage or Nature Power, as well as certain environment-dependent evolutions such as Magnezone.
Click OK to save changes and return to the Floor Editor.
We’ve changed our tileset to use lava, but we must also change the tiles themselves to be lava. There are 3 Gen Steps that work with water from a gameplay perspective:
- PerlinWaterStep: This step generates water (or lava, or abyss) terrain based on perlin noise. It creates realistic looking pools and lakes this way.
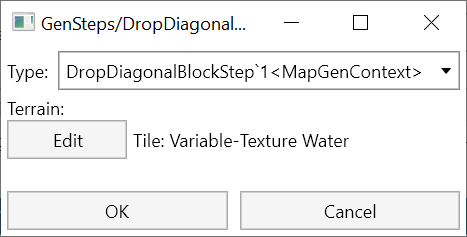
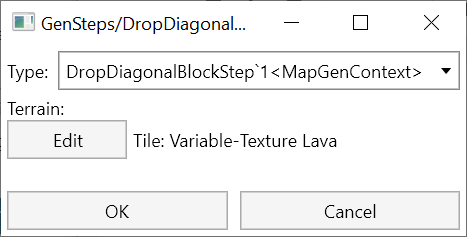
- DropDiagonalBlockStep: This step removes awkward situations where two water tiles are diagonally adjacent to each other.
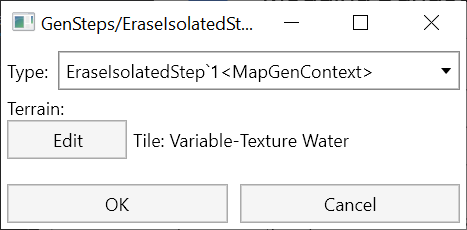
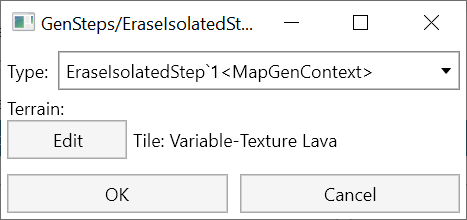
- EraseIsolatedStep: This step removes water pools that are completely surrounded by walls.
Technically, to add water to a floor you only need the first step, but the latter two steps are used to make the bodies of water appear more natural.
Edit each of them and change the Terrain variable to Variable-Texture Lava:
The resulting steps should show the change as well:
Editing Stairs
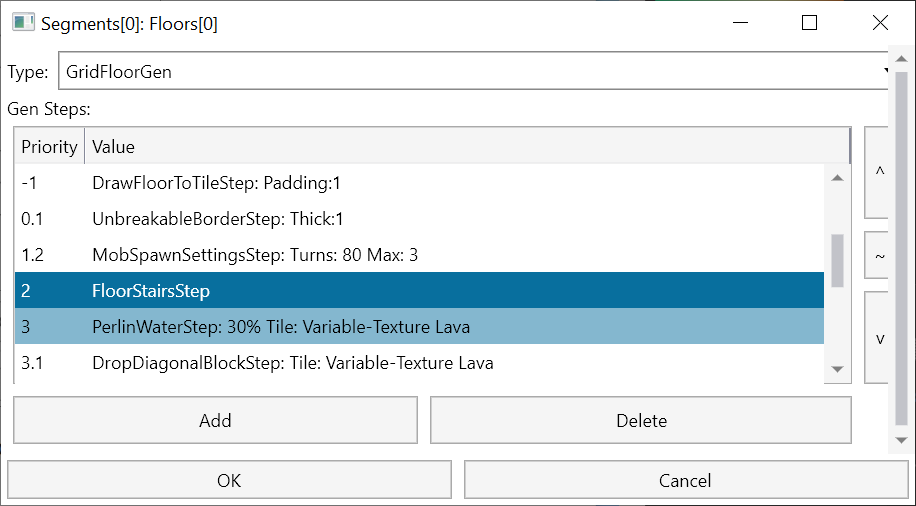
We’re making a dungeon that goes down, so we need to switch to using downward stairs. Edit the FloorStairsStep at Priority 2:
This step stores a list of all Entrance and Exit objects. When it runs, it finds a tile to place each entrance and exit on.
Entrances only store directional data. If you want to change the direction the player is looking when spawning in, change the Entrance’s direction.
Exits store data of the entire stairs tile.
It’s possible to specify multiple entrances and exits for a floor. However, we will just work with one right now.
Edit the single Exit:
There are two stairs in the tile ID list. Stairs 1 goes up, while stairs 2 goes down. Change the ID to stairs 2 and click OK until you return to the list of Gen Steps.
Introduction to Dungeon Algorithm
Tropical Path uses a Grid-style floor generation.
This means that it starts off as a grid of cells:
Then, the individual grid cells are filled in (blue) with connecting halls specified between them (yellow):
Each room and hall filled in here are also assigned an algorithm at this step.
The individual room algorithms then choose their size and location:
The rooms then signal their connection requirements to the halls, which then have their sizes chosen:
The grid is then made into a list of rooms and halls:
The algorithms in each room are then asked to generate:
Then, the hall algorithms are asked to generate:
This leaves us with a finished floor:
For a more in-depth explanation, visit the Floor Generation Overview.
Editing Floor Size
The current floor size for Tropical Path is quite small, due to being a first-time dungeon. Let’s increase the size.
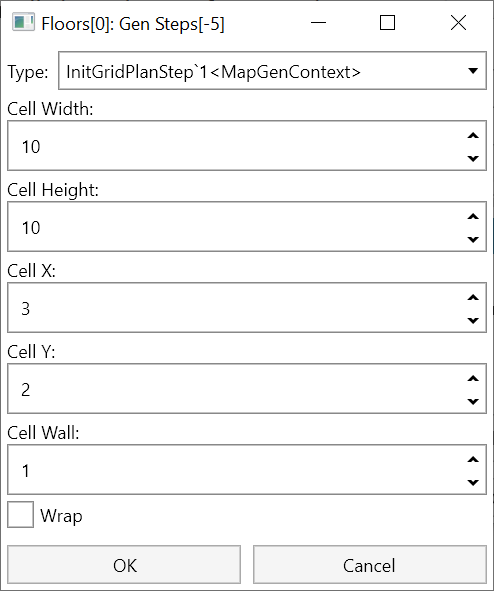
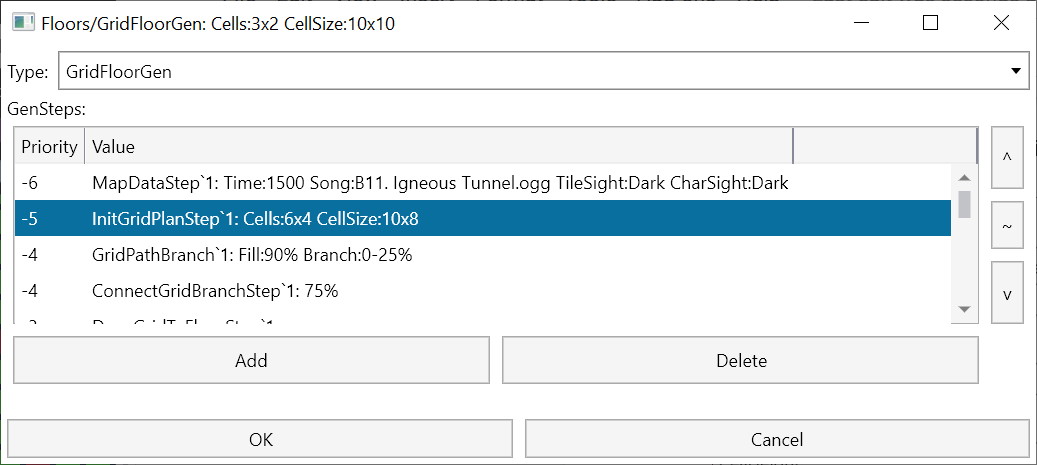
Edit the InitGridPlanStep at Priority -5:
All floors that use a Grid-style room generation are broken up into a grid of cells:
- CellWidth and CellHeight decide the width and height of each cell in tiles.
- CellX and CellY decide the number of cells per row, and the number of cells per column.
- CellWall decides the thickness of the borders separating cells, in tiles.
The settings above would result in a grid like this, where the red tiles are the borders between cells:
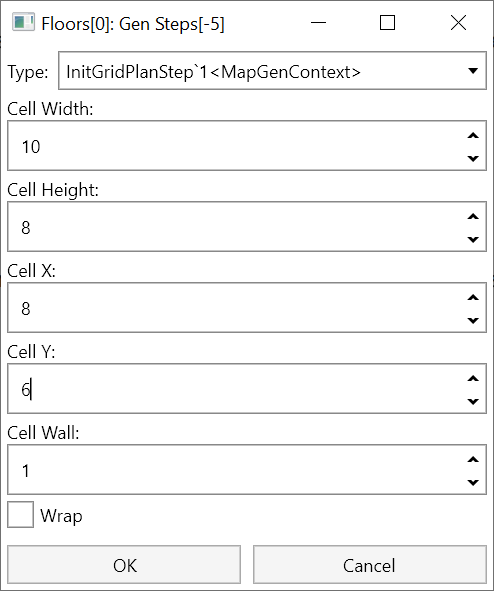
Let’s make the floor larger by adding more rooms. Turn it into a 6x4-celled grid where each cell is 10x8:
The end result would be a grid like this:
Click OK to save the size settings.
Editing Enemy Density
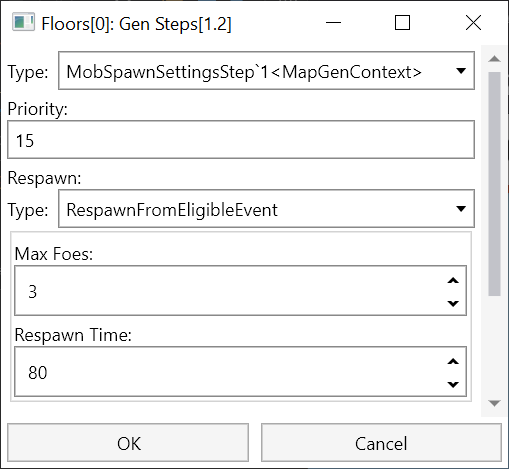
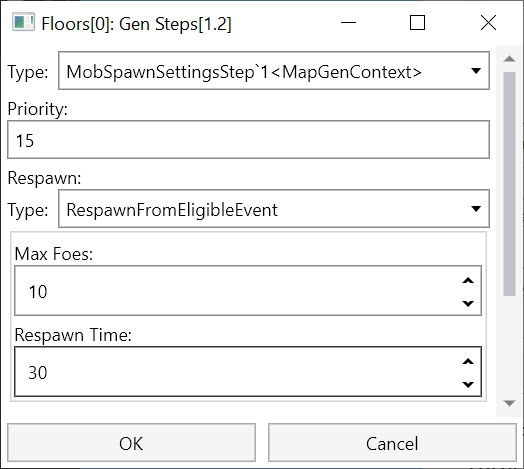
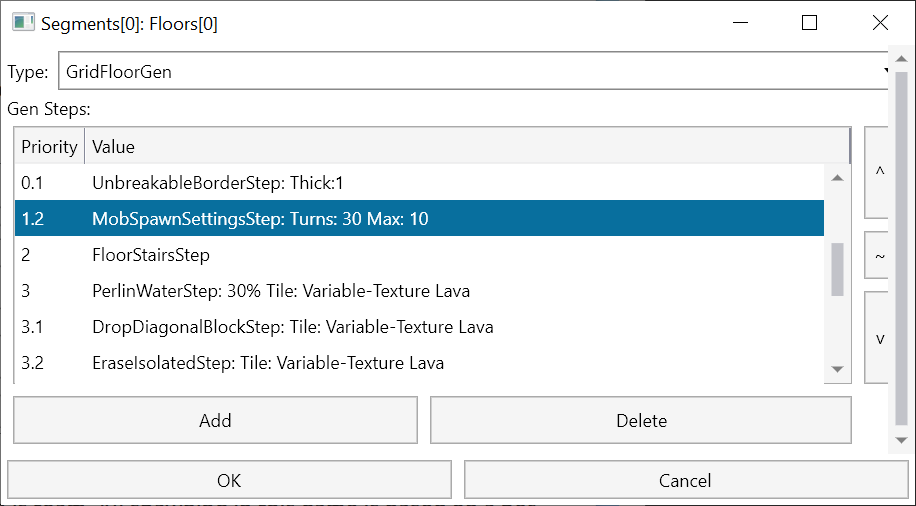
With the floor taking on a larger size, it would now be wise to increase the enemy spawn count. Edit the MobSpawnSettingsStep at Priority 1.2.
Max Foes is the maximum number of enemy teams that are allowed on the map. Set this to 10. Respawn Time is the number of turns before an enemy team is respawned. Set this to 30. The keyword here is team. All spawning in this game is based on a per-team basis, not a per-Pokemon basis. A single team can have 1 or more Pokemon.
We’ve increased the spawn cap and rate of respawn, but we still need to increase the initial spawns.
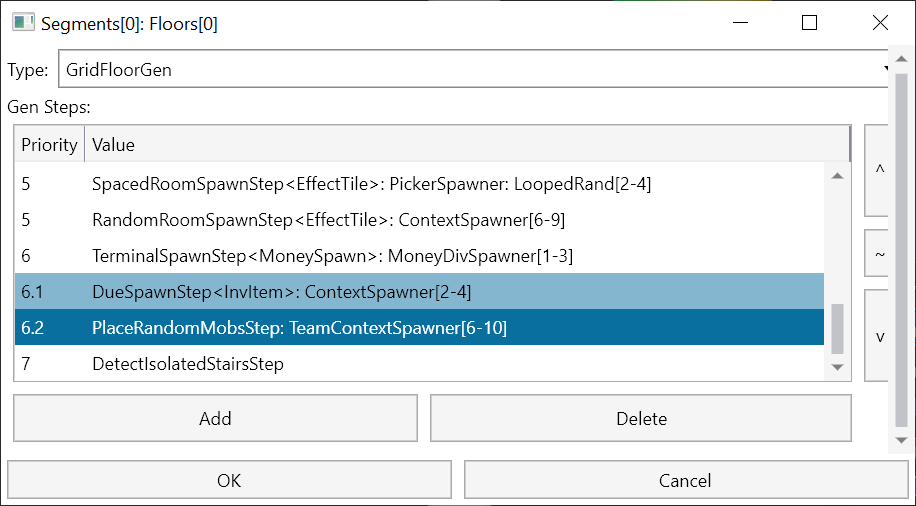
To edit the number of Pokemon Teams that are spawned when the map is first entered, open up PlaceRandomMobsStep at Priority 6.2:
There are many settings here, but we are only worried about the Amount, which controls how many teams are spawned at the beginning.
It is currently set to a range of 2-3 inclusive. Set it to a range of 6-9.
Click OK to save.
Editing Item Density
Now that the amount of enemies has been increased, it’s time to move on to item spawns. Due to the larger floors, we should also spawn more items.
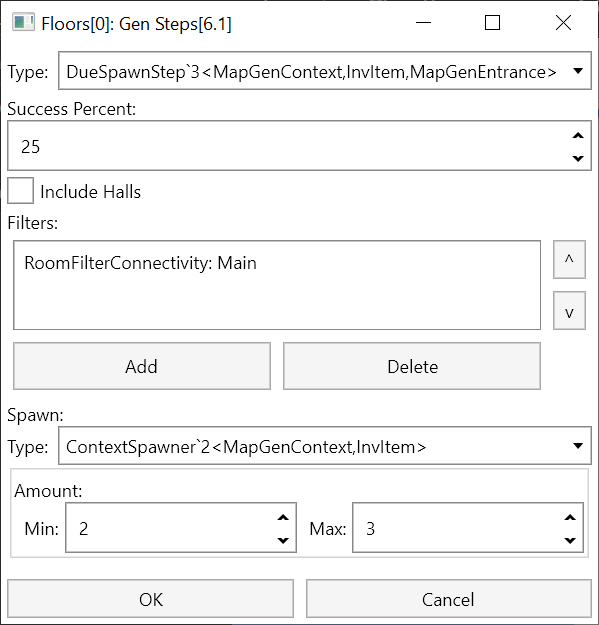
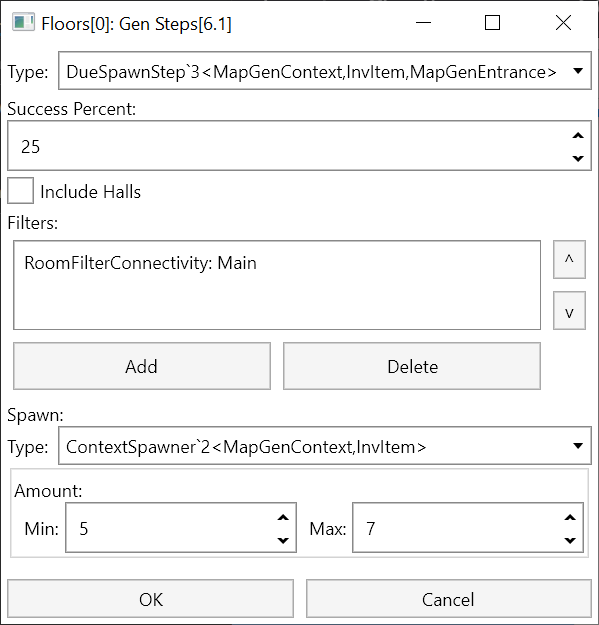
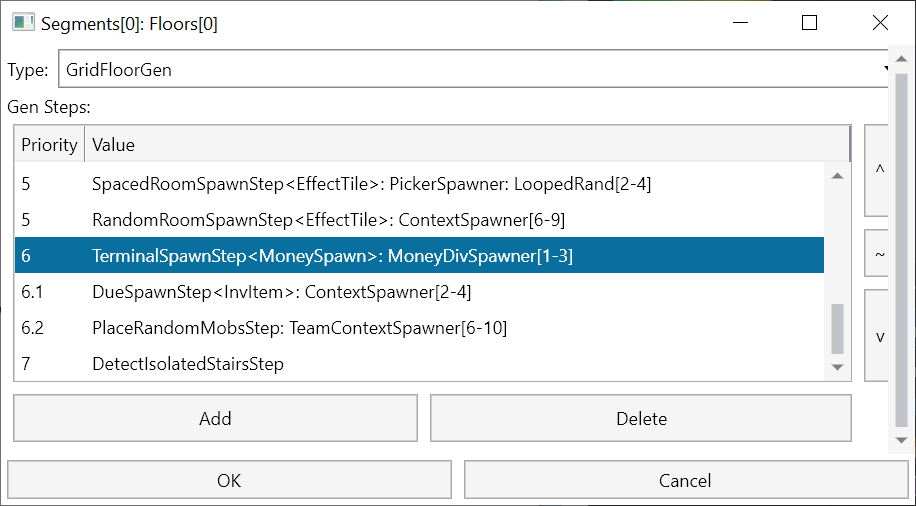
Open up DueSpawnStep at Priority 6.1:
Similar to PlaceRandomMobsStep, we are only worried about the Amount, which controls how many items are spawned during generation.
It is currently set to a range of 2-3. Set it to a range of 5-7.
Click OK to save.
Money spawns are handled separately. Open up TerminalSpawnStep at Priority 6:
The map generator takes the total Money assigned to this floor (specified elsewhere), and divides it into X piles.
The number of piles is specified in Div Amount, currently set to a range of 1-2. Set it to 6-10. Note that since we have divided the money into more piles, the amount from each pickup will be less. We will need to increase the money amount later.
Click OK to save.
We have finished changing all the settings we want for a single floor. We’ll worry about items and enemies later.
For now, click OK through everything, and test out the new dungeon.
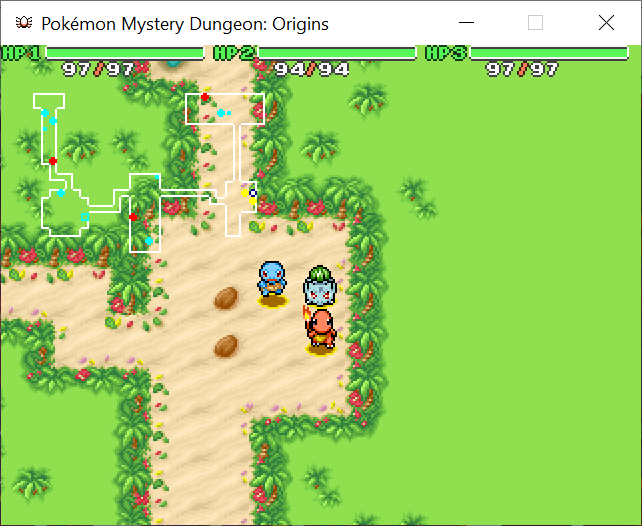
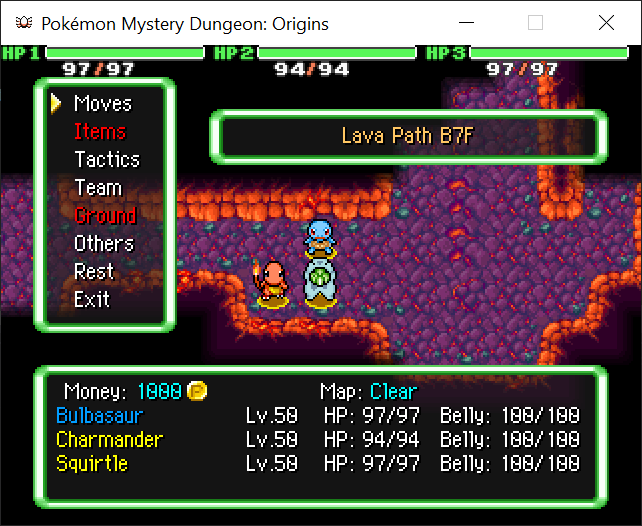
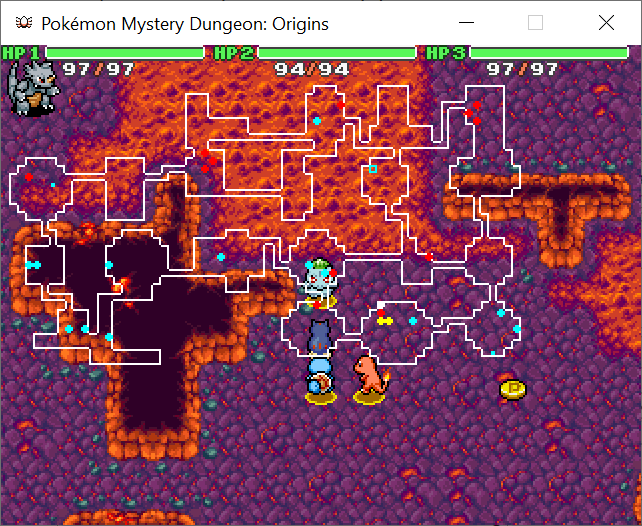
You should expect to see a much more sprawling floor layout, with the new tileset and music in place.
Changing Multiple Floors
However, if you were to get to the next floor, you will find that the layout is back to the original Tropical Path. We’ve only edited floor 1 of our dungeon so far. Return to the Segment Editor:
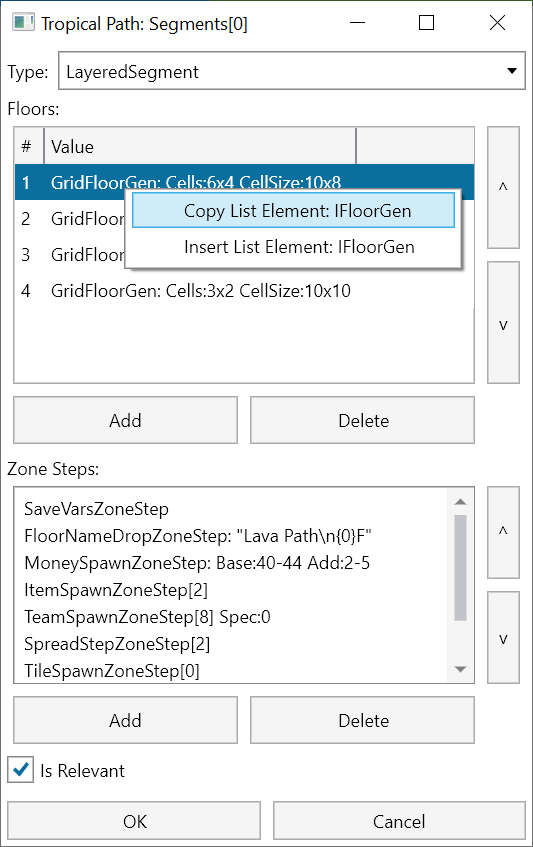
There are 4 floors in total. Right click the first one with all of the Lava Path data we want, and you will see the option to copy and paste individual floors.
Paste this floor 3 more times, and then delete all the older floors.
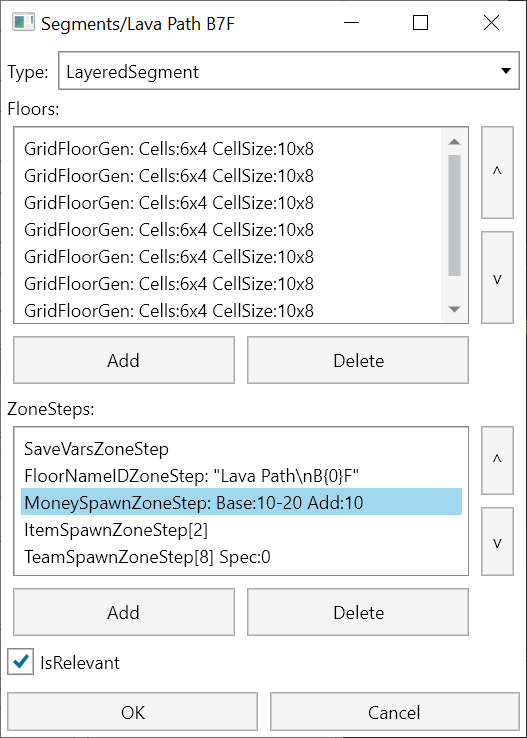
We now have all 4 floors changed, but for our dungeon, we want more. We can add more until there are 7, using the same pasting method:
There are now 7 floors in the floor list.
Click OK through everything to save the dungeon settings. You should now see the entire dungeon is consistent in its floor features. You may also notice the floor number has changed for the segment.
Editing Item Tables
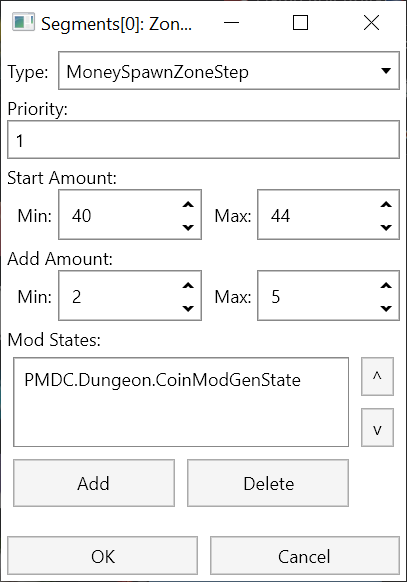
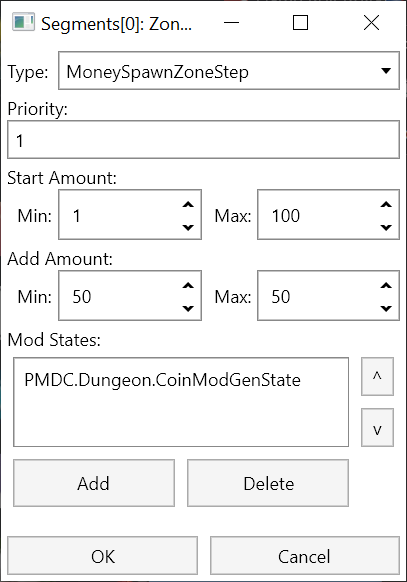
Lastly, we will change the item and enemy encounter tables. Open up the Segment editor and edit the Money Spawn Zone Step:
This zone step is responsible for assigning a total money value to every floor, for which the floor itself divides into its specified number of money spawns.
The Start Amount is the range for the total amount on floor 1. Set this to 50-100. The Add Amount is the range of how much money is added each floor. Set this to 50.
Click OK to save these values.
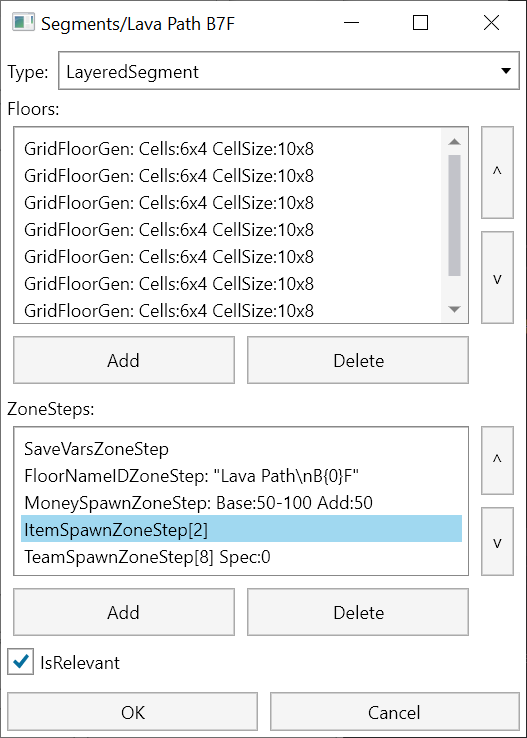
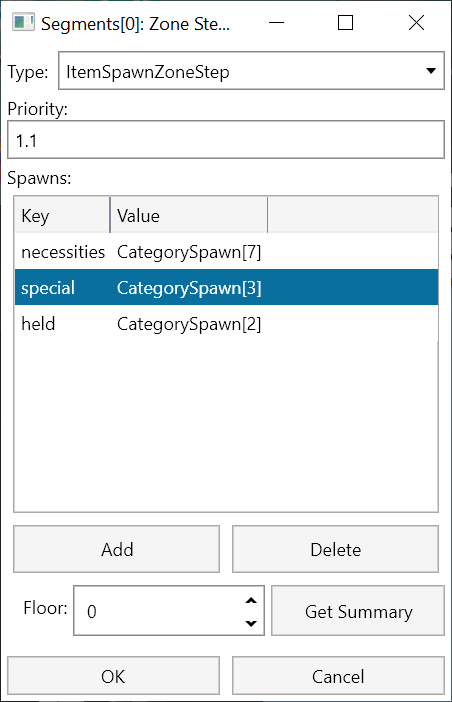
With the money amount increased, we will move on to items. Within the Segment editor, and edit the Item Spawn Zone Step:
Item spawns are broken up into groups of spawn tables. Here in Tropical Path, there are only two tables: one for necessities and one for special items. You as the editor can name these spawn groups whatever you want, but generally PMDO splits them up into the following categories:
- Necessities: Common replenishing items for HP, PP and belly. Includes Reviver Seeds and Link Boxes.
- Snacks: One-time-use, edible items. Most Berries and Seeds fall under this list.
- Boosters: Permanent stat boosters intended to pop up occasionally. Includes gummis and stat drinks.
- Ammo: Stackable, throwable items such as Gravelerock and Iron Thorn. Wands fall under this category too.
- Special: Apricorns, Keys, and Assembly Boxes.
- Orbs: All Orbs.
- Held: All Held items.
- TMs: All TMs.
This way, it is easy to adjust the rarity of all TMs, held items, etc. as a whole, and then adjust the rarity of individual items within each category.
For this tutorial, we will modify the necessities items to include grimy food and less apples, and add some held items as a new category.
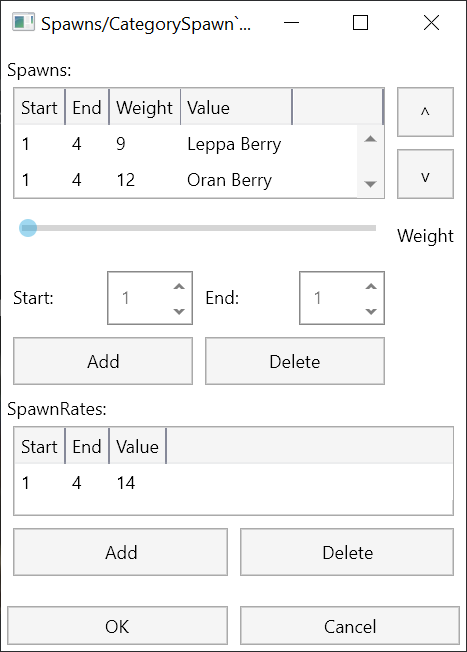
Open the necessities category to edit the spawns.
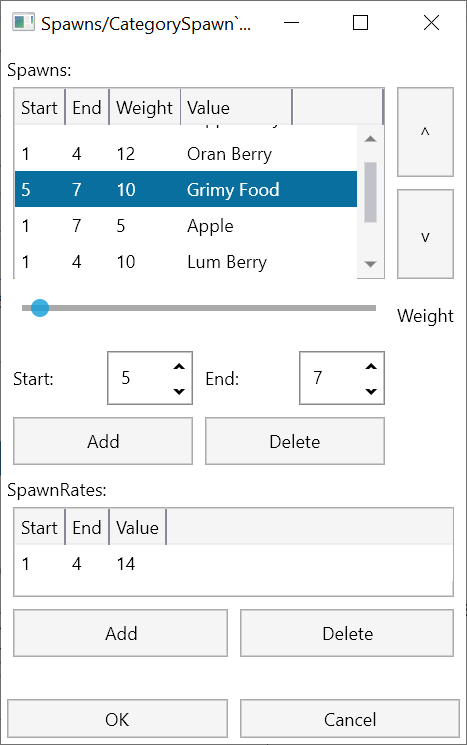
Every spawn in this list has a Start, End, and Weight:
- Start and End are the first and last floors the item can appear in.
- Weight controls how common the item is within this spawn group. To get its percent chance of appearing in a given floor out of all possible items within this category, add together the weights of all the items and divide the item’s weight.
If you add up the weights of all items on floor 4, you get:
9+12+10+10+5+9=55
Which means the Leppa Berry has a 9/55=16.36% of appearing among items in its group.
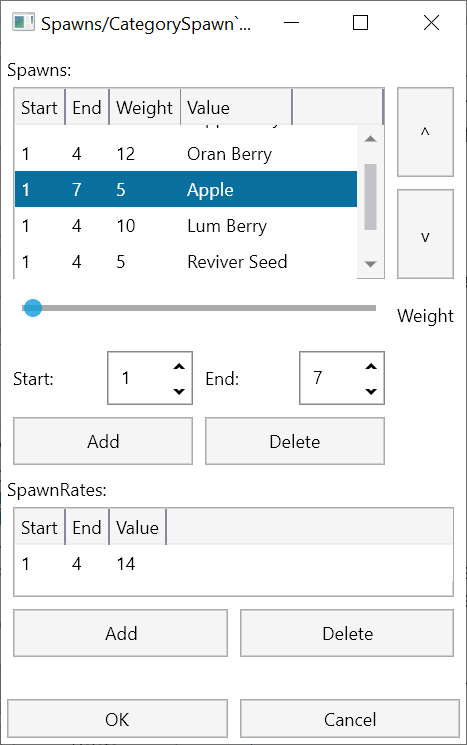
Let’s modify the Apple spawn to the above image. You must first by select it.
- Lower the weight of the apple to 5. You can do this by changing the numeric value for weight.
- Increase the End value of the apple to 7. You can do this by changing the numeric value for End.
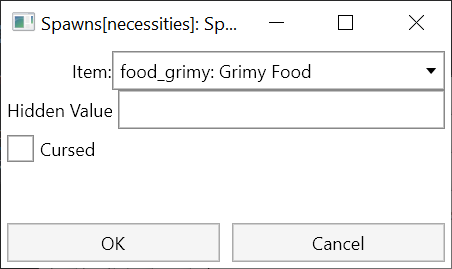
Let’s also click Add to add a new item, the Grimy Food:
Let’s also make it spawn only on floors 5-7.
As a result, if you go to floors 5-7, you will have a 5/15=33.3% chance of finding an apple, and a 10/15=66.6% chance of finding a grimy food, and nothing else.
Now, let’s move on to SpawnRates. The Start and End control which floors the entire category of items appear in, and the Value controls the chance that the category itself has to spawn.
Currently the “necessities” category itself is set to spawn only on floors 1-4, with a weight of 14.
The other category in the list, “special”, has a weight of 7. As a result, the “necessities” category has a 7/(7+14)=33.33% chance of being chosen when spawning items.
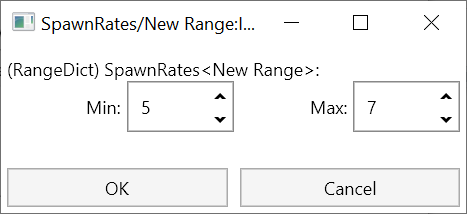
Add a new Spawn Rate.
Give it a range of 5-7, and a weight of 10.
This allows the category to have a lower rate of appearing on floors 5-7. It doesn’t matter right now since no other categories spawn at floor 5-7, but we will soon make a new category. Click OK to save the info.
Next, click on Add to add a new category for held items.
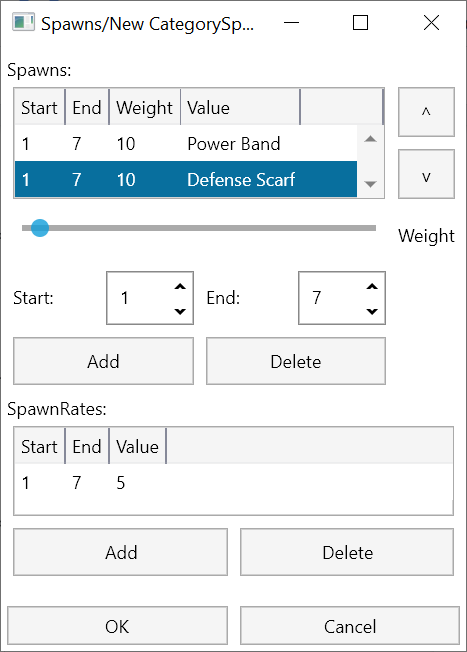
Give it the name “held”
Make the changes as shown in the above screenshot:
- Add a Power Band and Defense Scarf, both with a Start of 1 and End of 7, so that it appears on floors 1-7.
- Make this spawn group appear on floors 1-7, with a weight of 5. For floors 1-4, this will result in a total weight of 7+14+5=26, meaning it has a 5/26=19.23% chance of being chosen. For floors 5-7, the total weight is 10+5=15, which means a 5/15=33.33% chance of being chosen.
Click OK to save this new item category.
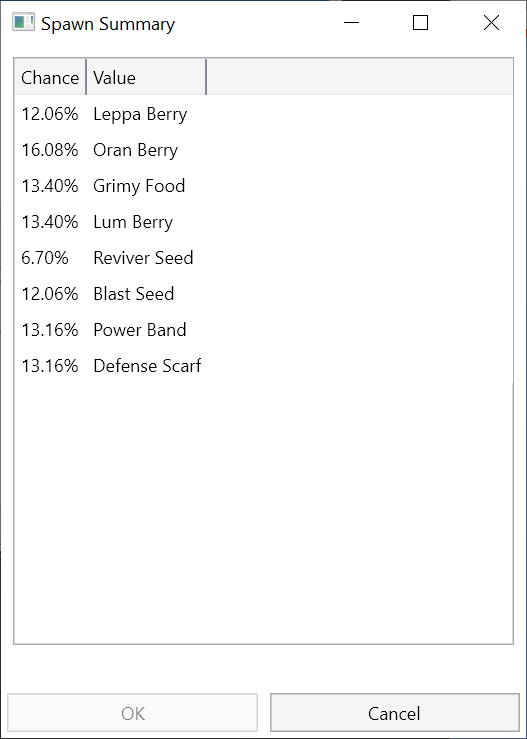
You can preview a calculated percentage list of ALL items from ALL categories for a floor, by selecting the floor number at the bottom and clicking Get Summary. For example, this is what the full item table for floor 1 looks like:
Click OK to save the item table as a whole.
Editing Encounter Tables
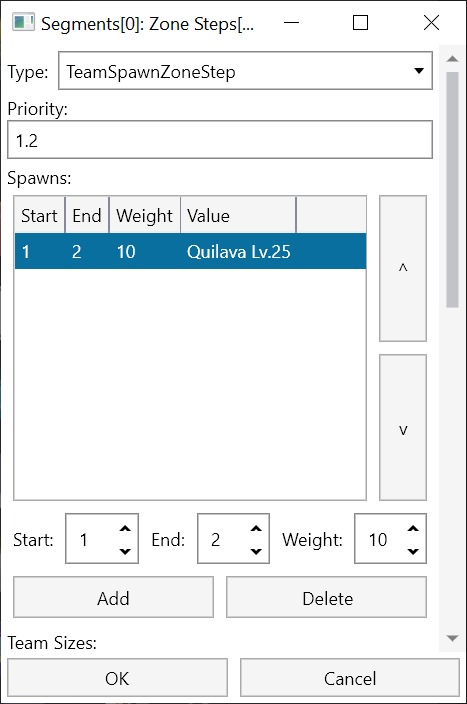
Next, edit the Team Spawn Zone Step:
With enemy spawning, there are no categories like with items. Instead, you just choose what spawns on what floor directly. However, enemies will always spawn in teams of 1 or more.
The Spawns table controls the pool from which the Pokemon are selected from. These Pokemon are level 2, though there are some that are level 5 later in the dungeon.
The Team Sizes table controls how many members are in a given spawned team. In Tropical Path, it is set to 1 for all floors 1-4, so Pokemon will always spawn alone and never in groups.
Specific Spawns are pre-made teams that will spawn all at once, without relying on chance to create the desired team composition. This is rarely used, and won’t be used in this tutorial.
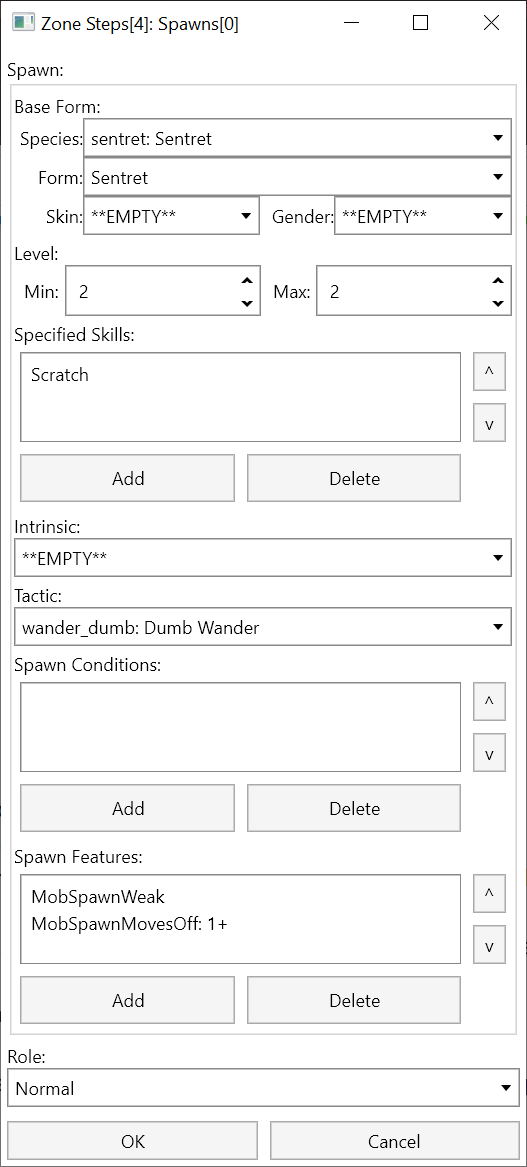
Let’s make this into a tougher dungeon. Begin by editing the Lv. 2 Sentret.
The attributes of this editor window are as follows:
- You can choose the Pokemon spawned, including its species, form, skin (shiny or not), or gender.
- You can leave Skin and Gender blank and they will be rolled based on their typical probabilities.
- You can specify a min and max level for the Pokemon to spawn at. PMDO typically uses only a single level rather than a range.
- Specified Skills are moves that the Pokemon will carry. If you choose less than 4, the remaining moves will be rolled from its level-up set.
- Intrinsic is the ability. You can leave this blank to let the spawner roll it randomly.
- Change Tactic to change the AI of the Pokemon.
- Spawn Conditions make it such that the Pokemon only appears under certain conditions. Typically, this is used for version exclusives.
- Spawn Features are additional modifications made to the Pokemon when it is spawned. Typically, most use MobSpawnWeak and MobSpawnMovesOff.
- Role is the role that the spawned Pokemon has in the team.
Possible roles include:
- Normal: Can be added as a part of the team in any circumstance.
- Leader: Can only be added as the leader of the team, meaning at most one per team.
- Support: Can only be added as support to the team. It will only show up in teams of size 2 or greater.
- Loner: Can only spawn alone.
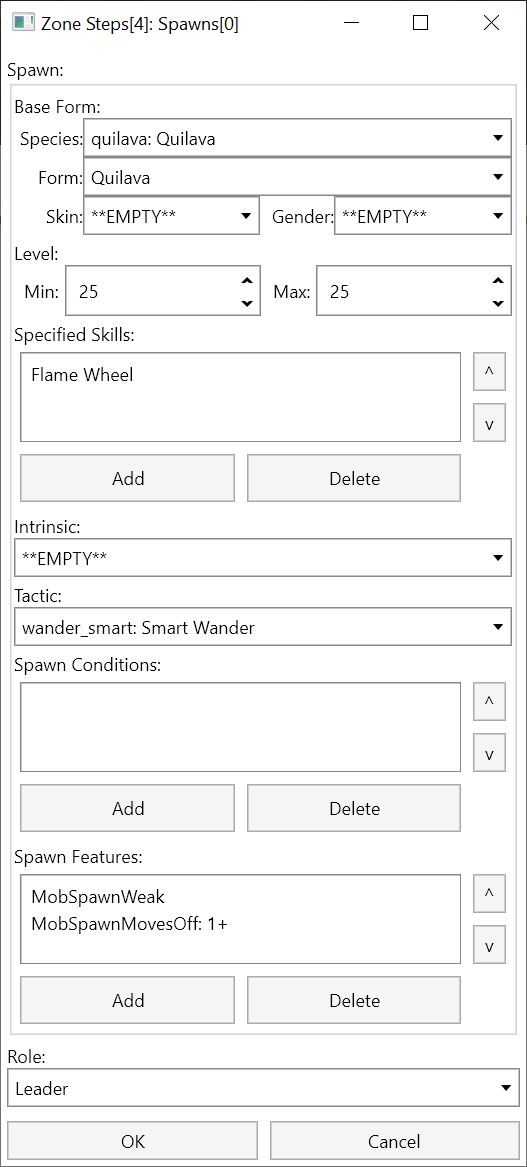
Let’s change this into a level 25 Quilava with a more fitting move, and smarter AI:
The changes in the above screenshot are as follows:
- Set the species to Quilava. The form will automatically be set.
- Set the level to 25. Lowest and Highest bound will be the same.
- Give it Flame Wheel instead of Scratch.
- Set the AI to Smart Wander. Similar to Dumb Wander, this AI will wander the floor and attack the player on sight. Unlike Dumb Wander, it will always use the longest-range move that can hit the player.
- We’ve also given it the Leader role. Only one will spawn per team.
Click OK to save the Pokemon.
Remove all other spawns, and change the Start and End of this spawn to 1-7 so that it spawns in the entire dungeon.
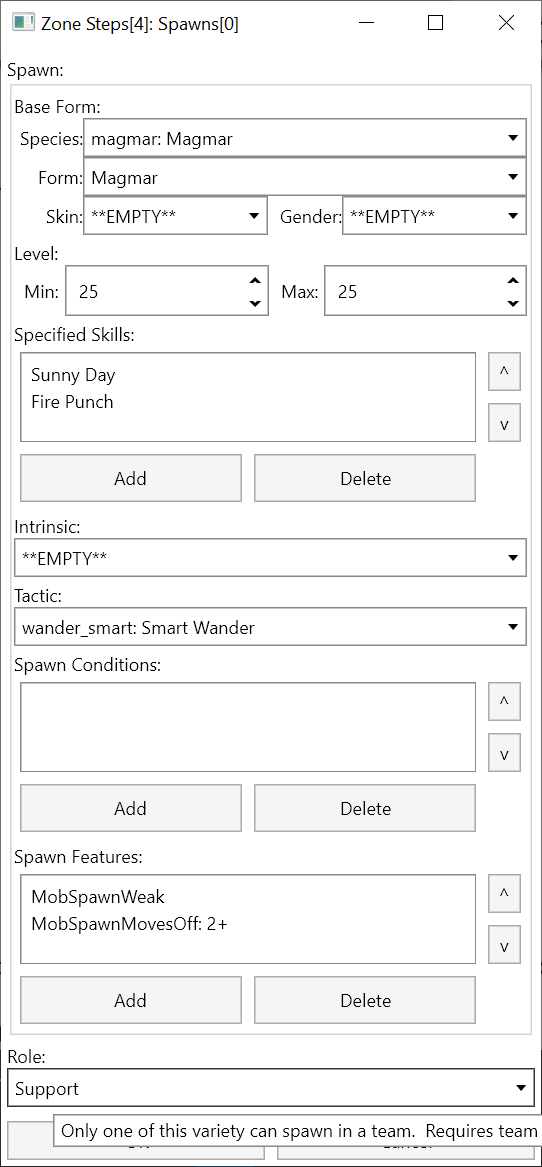
Next, add a new spawn. This time, we will create a Magmar with multiple moves.
Give it the MobSpawnWeak feature, just like Quilava. This feature lowers the PP and belly of the Pokemon when it spawns. Also give it MobSpawnMovesOff, but set the StartAt to 2. This will turn off any move after the 2nd move index, making it only use Sunny Day and Fire Punch. Lastly, give it the Support role. It will spawn as the follower to the team.
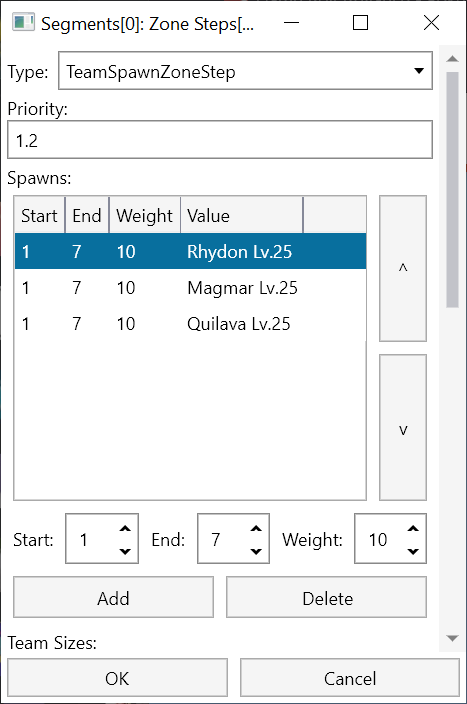
Click OK to save the Pokemon, and make it appear on all floors.
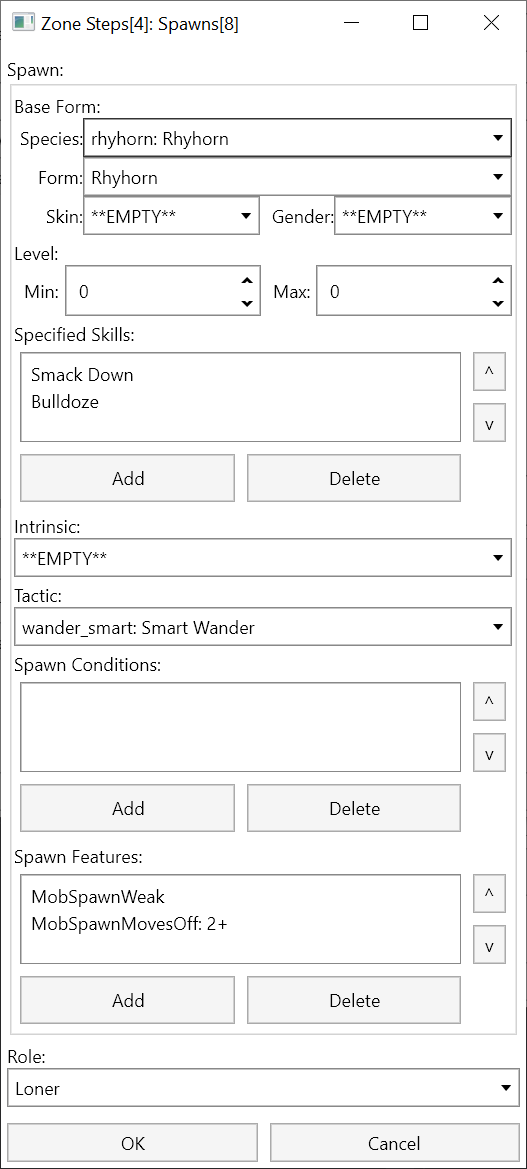
Then, add one more Pokemon.
This will be a Rhydon with Smack Down and Bulldoze.
We’ve also given it a Loner role.
Click OK to save this, and make it appear on all floors.
Lastly, we will alter the team sizes.
Currently, team sizes of 1 exist for floors 1-4, with weight 12.
Let’s add another Team Size of 1 for floors 5-7, but give it a weight of 4.
Then, let’s add another team size of 3 to floors 1-7, with weight 8.
This makes floors 1-4 have a 12/20=60% chance to spawn a lone enemy, and a 8/20=40% chance of spawning a team of 3.
Then, at floors 5-7 there will be a 4/12=33% chance to spawn a lone enemy, and a 8/12=66% chance of spawning a team of 3.
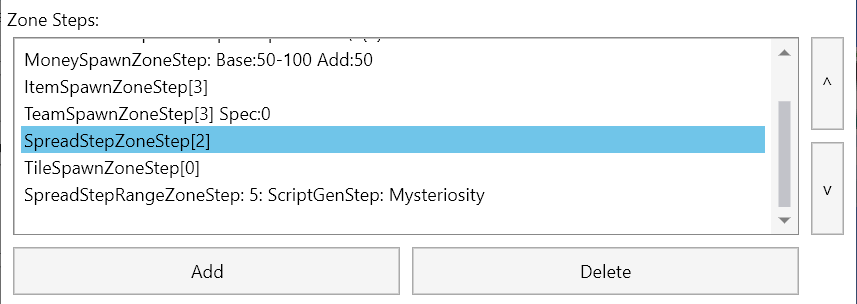
Click OK, and give the ZoneSteps list one more view:
You may notice in your last playtest that you ran into some neutral NPCs wandering the map. The SpreadStepZoneStep is responsible for adding them randomly to the dungeon as a whole. Remove this step to delete those NPCs from the dungeon.
Then, click OK through everything and save the whole dungeon.
Your can now run through the fully modified dungeon with all of its altered features. Once you exit the dungeon, however, you will land in the Forest Camp. What we want to do is have this dungeon end in a boss room with a cutscene. To do this, we will need to edit the completion events.
Editing Completion Events
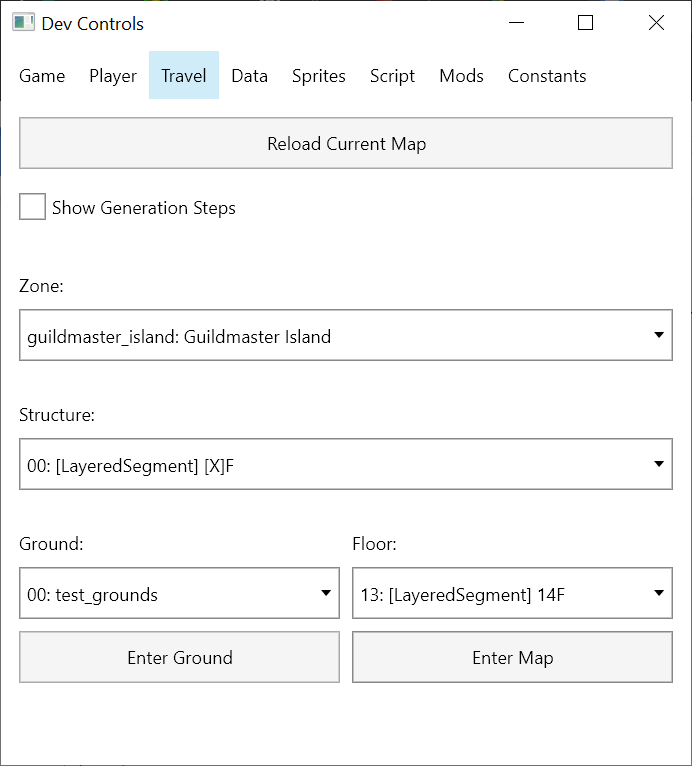
For this section, we will be using the ground map created in the tutorial for Creating Ground Maps, and the boss map created in the tutorial for Creating Dungeon Maps. Make sure Temporal Pinnacle is groundmap 13 of the Zone 1: Guildmaster Island, and that there is a 13th map in Layered segment 00:
Completion events are controlled entirely in a zone’s script.
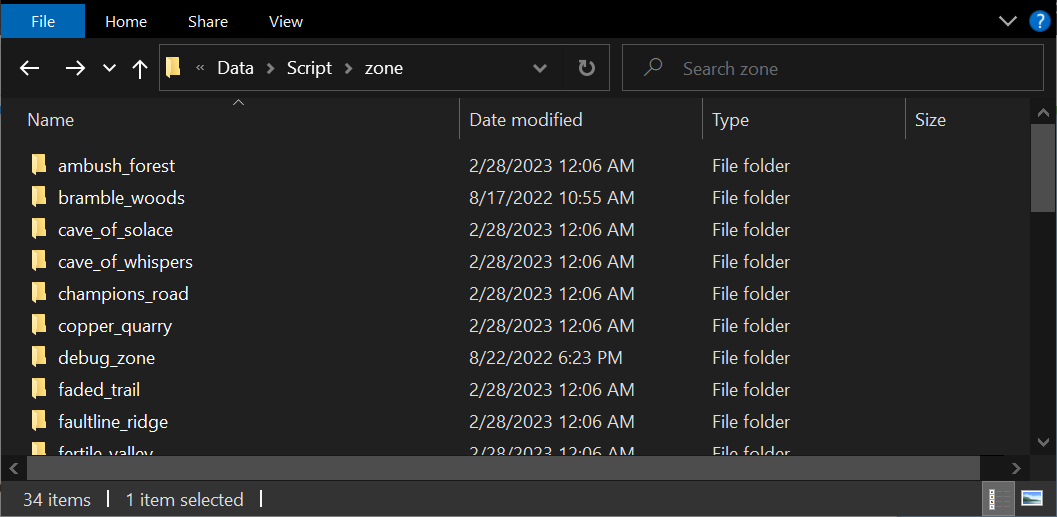
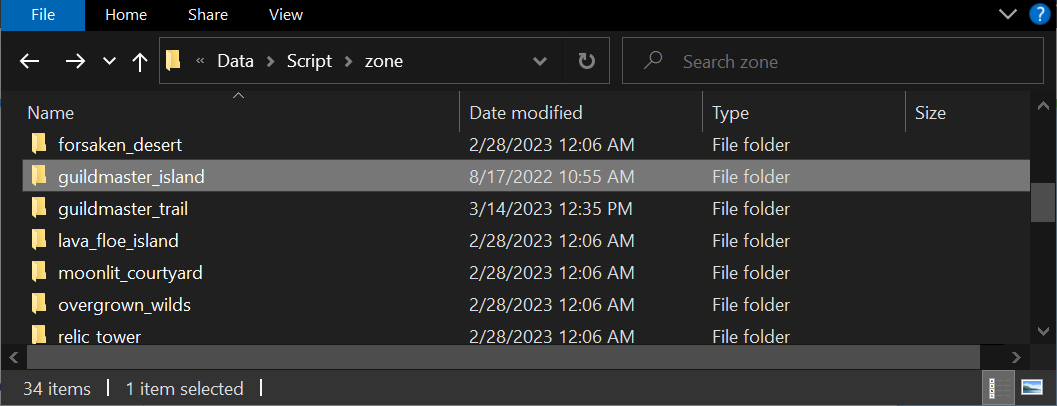
Navigate to Data/Script/Zone/ in your PMDO folder.
This is where scripting for every zone is stored. When making mods that change scripts, we need to make a copy from the base game and place it in our mod.
The result should look like this.
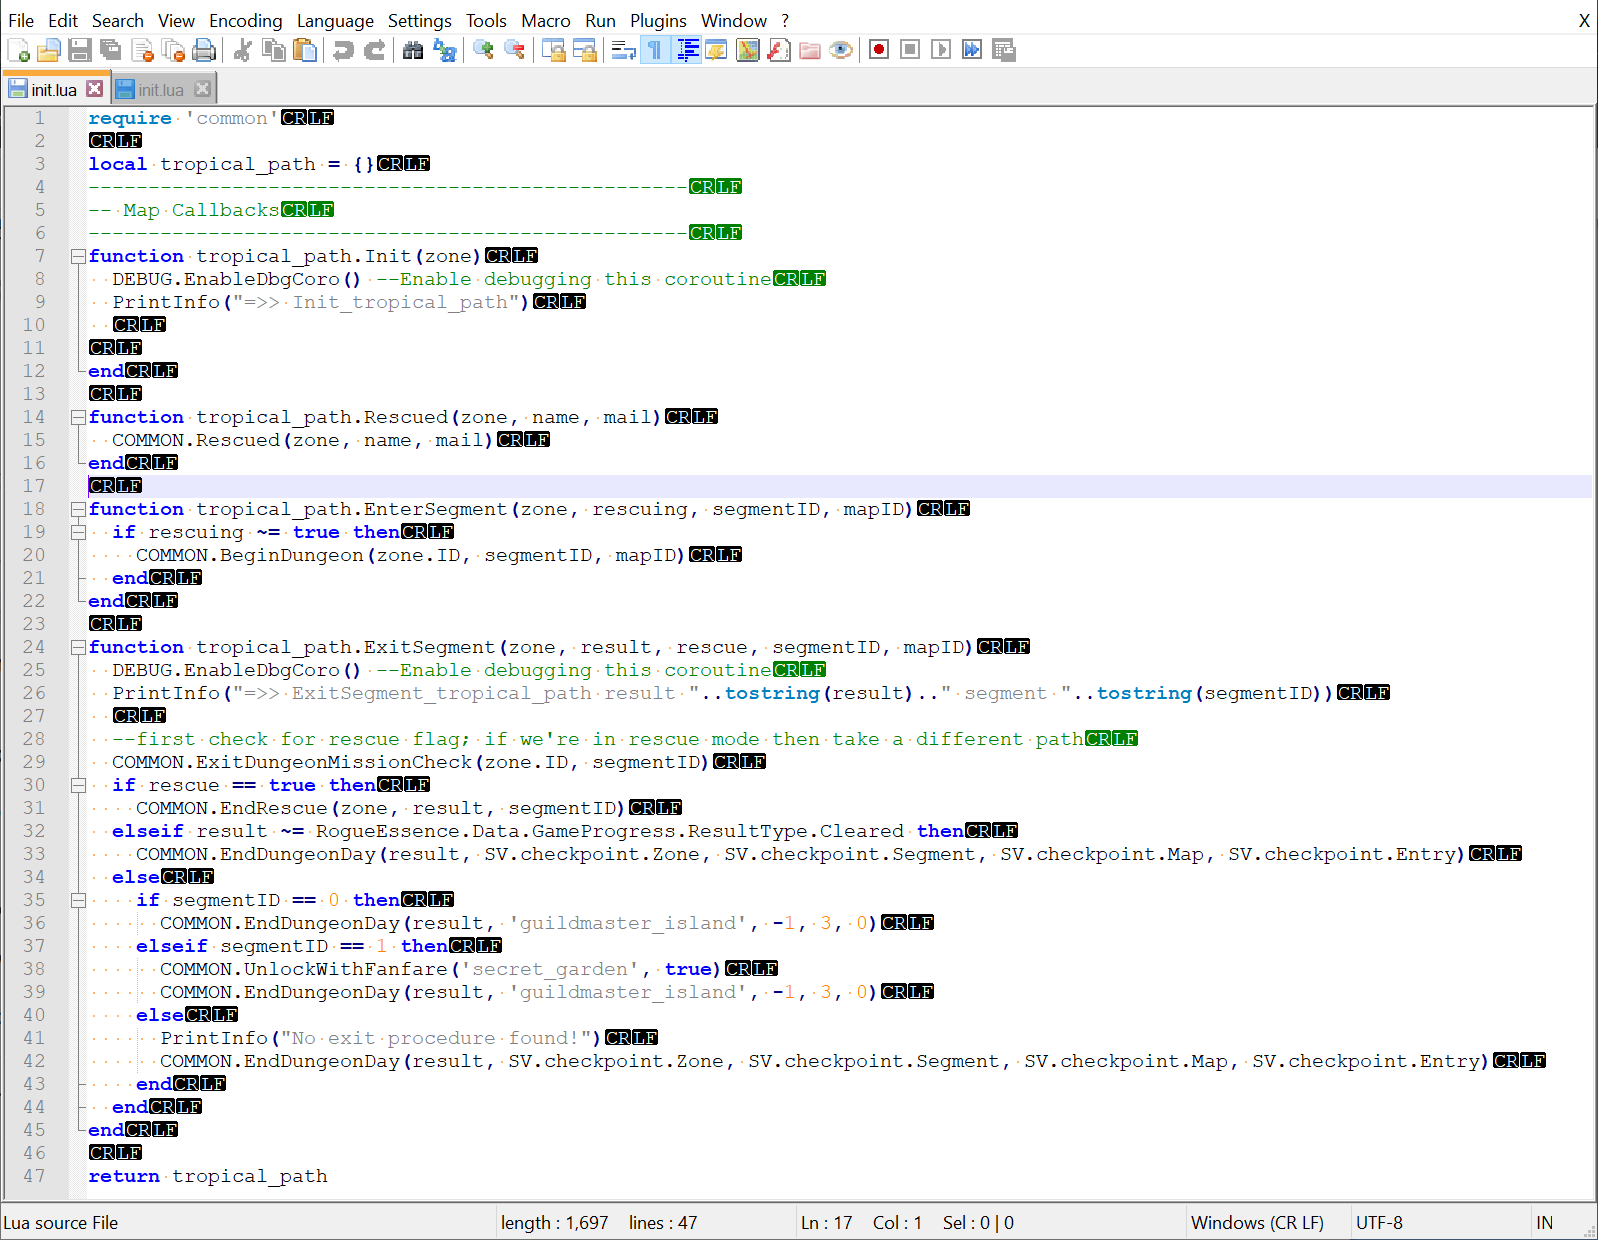
Open the folder tropical_path, and open init.lua in a text editor (Notepad++ recommended)
All dungeons have a script that gets called when the zone is loaded (Init), when a rescue is performed (Rescued), when a segment a entered (EnterSegment), and when a segment is exited (ExitSegment). We’re interested in the last one.
ExitSegment currently checks to see if we completed the dungeon within a rescue mission (Line 30)
Then it checks to see if the outcome of the segment wasn’t a success (Line 32). This block is for cases like fainting in a dungeon, escaping, or timing out due to wind.
Lastly, after all those checks, we know that the player has completed the segment (Line 34).
Within this block, we check which segment the player cleared, and act accordingly.
We are interested in Line 36:
COMMON.EndDungeonDay(result, "guildmaster_island", -1, 3, 0)
This method call is a general dungeon completion event, which increments the day count, restores everyone’s HP, displays the win/lose screen, and then warps them to the specified destination. In this case, it is warping the player to Guildmaster Island. Segment -1: Ground maps. Ground Map 3: Forest Camp. Entry 0: Default Entrance.
We don’t want to end the dungeon adventure just yet. We just want to warp the player to the ground map for Temporal Pinnacle so that it can start the boss battle. Replace it with the following call:
GAME:EnterZone("guildmaster_island", -1, 13, 0)
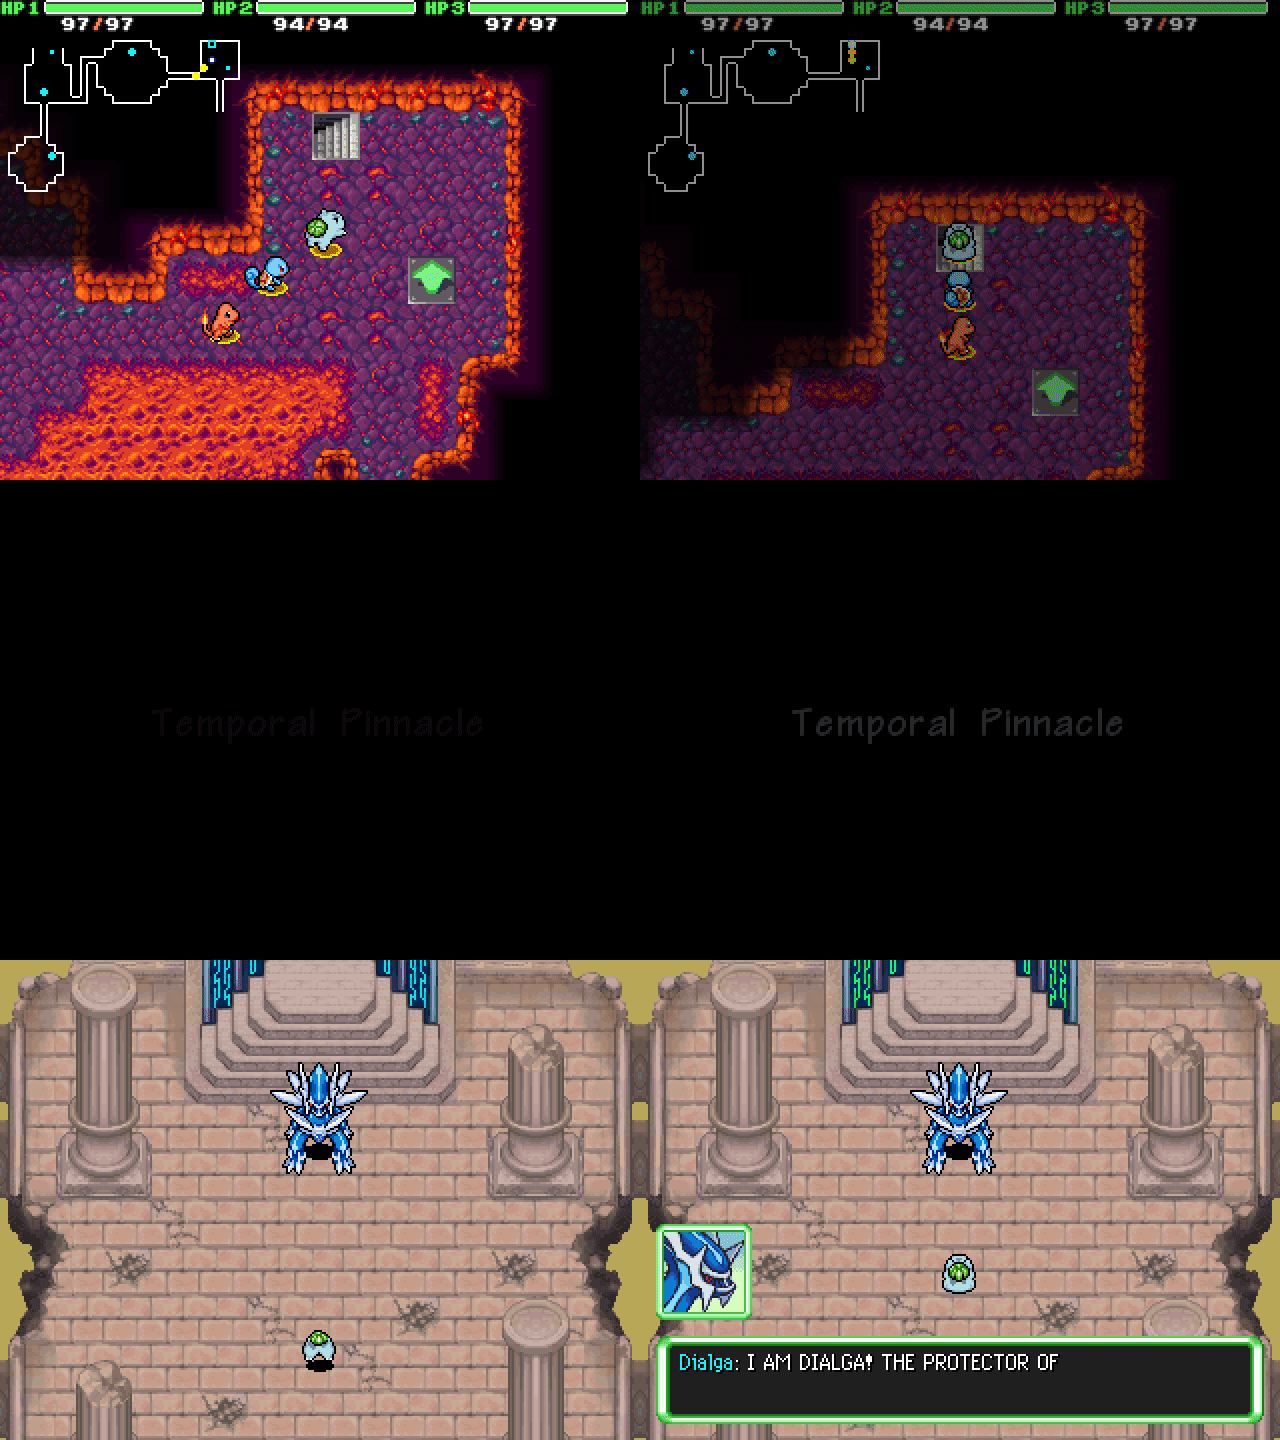
This will send the player into Temporal Pinnacle.
Additionally, you can see lines 37, 38, and 39 all reference an exit through the secret room, to unlock a new dungeon. Since we removed the secret room, we can remove those lines too.
Save this file, reload the scripts, and retry a run through the dungeon.
It now leads to Temporal Pinnacle.
Lastly, if we want to end the dungeon properly on completing the boss battle, we need to include a call to EndDungeonDay in the zone script where the boss battle takes place. In this case, it is in Data/Script/Zone/guildmaster_island
Copy this folder to your mod.
And then open the contents.
The ExitSegment block should look like this:
function guildmaster_island.ExitSegment(zone, result, rescue, segmentID, mapID)
  DEBUG.EnableDbgCoro() --Enable debugging this coroutine

  COMMON.ExitDungeonMissionCheck(zone.ID, segmentID)
  if rescue == true then
    COMMON.EndRescue(zone, result, segmentID)
  elseif result ~= RogueEssence.Data.GameProgress.ResultType.Cleared then
    COMMON.EndDungeonDay(result, SV.checkpoint.Zone, SV.checkpoint.Segment, SV.checkpoint.Map, SV.checkpoint.Entry)
  else
    if segmentID == 0 then
	  if mapID == 3 then
	    COMMON.EndSession(result, 'guildmaster_island', -1,3,0)
	  else
	    PrintInfo("No exit procedure found!")
		COMMON.EndDungeonDay(result, SV.checkpoint.Zone, SV.checkpoint.Segment, SV.checkpoint.Map, SV.checkpoint.Entry)
	  end
    else
      PrintInfo("No exit procedure found!")
	  COMMON.EndDungeonDay(result, SV.checkpoint.Zone, SV.checkpoint.Segment, SV.checkpoint.Map, SV.checkpoint.Entry)
    end
  end
end
We want to detect a case where the player has cleared segment 0, map 13. Then, we want to end the dungeon day with the destination set to Guildmaster Island, Segment -1, Map 1, Entrance 0. Aka Base Camp:
COMMON.EndDungeonDay(result, "guildmaster_island", -1, 1, 0)
The result should look like this:
function guildmaster_island.ExitSegment(zone, result, rescue, segmentID, mapID)
  DEBUG.EnableDbgCoro() --Enable debugging this coroutine

  COMMON.ExitDungeonMissionCheck(zone.ID, segmentID)
  if rescue == true then
    COMMON.EndRescue(zone, result, segmentID)
  elseif result ~= RogueEssence.Data.GameProgress.ResultType.Cleared then
    COMMON.EndDungeonDay(result, SV.checkpoint.Zone, SV.checkpoint.Segment, SV.checkpoint.Map, SV.checkpoint.Entry)
  else
    if segmentID == 0 then
	  if mapID == 3 then
	    COMMON.EndSession(result, 'guildmaster_island', -1,3,0)
	  elseif mapID == 13 then
	    COMMON.EndSession(result, 'guildmaster_island', -1,1,0)
	  else
	    PrintInfo("No exit procedure found!")
		COMMON.EndDungeonDay(result, SV.checkpoint.Zone, SV.checkpoint.Segment, SV.checkpoint.Map, SV.checkpoint.Entry)
	  end
    else
      PrintInfo("No exit procedure found!")
	  COMMON.EndDungeonDay(result, SV.checkpoint.Zone, SV.checkpoint.Segment, SV.checkpoint.Map, SV.checkpoint.Entry)
    end
  end
end
Save the script, and run through the dungeon once more. Defeating Dialga should properly end the dungeon with a victory screen now.
This tutorial is able to show you the main aspects of dungeon editing. However, you may want to make an entirely new dungeon and attach it to the existing game. To learn how to do that, visit the dungeon adding tutorial: Creating Dungeons from Scratch

